
Your eCourse Setup Step By Step
You’ve done all the hard work, now it’s time to get everything set up. This isn’t hard, so don’t worry yourself over it! It’s a lot easier than setting up a membership site, and we’ve listed each step below. If you need more help, we have accompanying worksheets available for download.
1) Create a Sales Page
A sales page is a page where you place your eCourse for sale, and where people can click through to buy it via PayPal. It’s really just another page to your website. You can create a dedicated webpage with its own URL for each of your courses, or you can use your current domain name and add a new page.
Your sales page should explain the pain points that you can solve with your eCourse and how your eCourse is different and the answer and ideal solution to their problems. Save this page as a draft.
2) Create a PayPal Button
Go into PayPal and create button. There are two types of button you might use: a subscription button if you want recurring payments (e.g. every week or month), or a one-time payment button. Set it up to charge your members however you want to charge them. Remember the name of what you called this button as you will need it later.
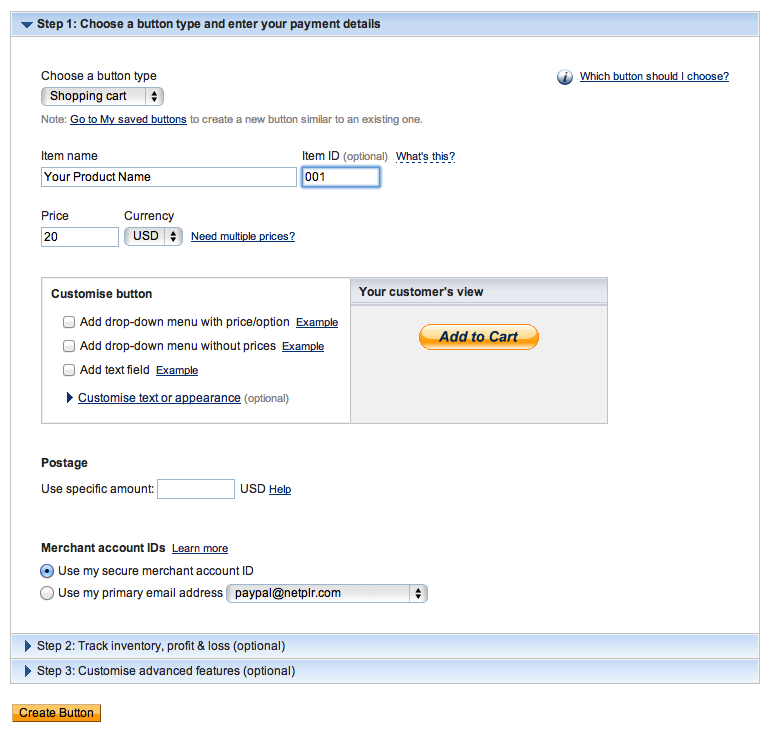
Click image to enlarge
Alternatively, if you have another program or way of creating a PayPal button use it instead. The object is to have a way for the buyer to pay you whether you create it in PayPal or some other way.
3) Set up Aweber
Go to Aweber and set up a new list. It’s under “Create and Manage Lists”. Ideally, you’ll name this new list after your eCourse. Just use a name that will jog your mind about what this eCourse is about. Remember what you call this list.
4) Link Your List and Your Payment Button
Now load up the Aweber PayPal app here: https://www.aweber.com/users/apps
If you’ve never used it before, you’ll need to follow some initial set up instructions. Once you’ve done that, you can link the button you just created with the list you just created.

5) Load eCourse into Aweber
Go ahead and load each section of your course into Aweber. Start with a thank you for subscribing, or welcome letter and an overview letter that describes exactly what the student will be learning over the course of the few weeks or month.
Your welcome letter should explain exactly what the student gets, how to contact you if there are problems with delivery, how to white list your email address, how to cancel and unsubscribe and the risks of doing so (having to start all over), how much they’re paying, and when and what to expect. By also including the course outline and a syllabus it will be an excellent way to get your audience excited.
6) Test!
Now all you need to do is edit and review each page that you’ve created and then make all the pages live. Then you need to find someone to test out the system to be sure every step works and is understandable.
You can refund their money for testing it. Tell them you’ll refund their money after the 2nd week (alternatively you can pay them up front for a couple of weeks) and allow them to keep getting the course for free in exchange for testing it out for you.
In fact this might be a good way to do it. But make sure all goes well or eventually goes well. Ask the person testing it if they themselves would buy it (if they tested it for free or you gave them their money back) and if the answer is positive then ask them to recommend it to their friends or associates. Make them an affiliate if you have an affiliate program.


